Turning Mistakes into Masterpieces: My Journey Building a Laser Engraver CNC Machine
This project did not started as laser cutter ...
This project didn’t start as a laser cutter. My original idea was to build a plasma cutter. I bought a small Parkside plasma cutter, the PPS 40 B2, and thought I could create a compact table for cutting. I already had some Arduino parts, a few NEMA 23 motors, and, of course, the plasma cutter itself. All I needed was to build a frame and purchase motor controllers. I came across JD Plasma cutting plans, which seemed like the perfect fit, so I bought them from JD’s Garage. My plan was to create a small 70x70cm table for cutting metal parts. It sounded simple and exciting—but I couldn’t have been more wrong! Little did I know, this idea would evolve into an even better project.


Since I have a few 3D printers, I got started by printing the parts needed for the JD Plasma plans. It was a long process—200 hours of printing, or maybe even more. I made a lot of beginner mistakes, like using the wrong material or specifications


Those errors wasted a lot of time and filament, but eventually, I managed to assemble a decent JD Garage frame for the plasma cutter. Success, right?


Table Frame
Well, not quite. The next step was to create a table to mount the frame and complete the setup. However, I realized I didn’t have a proper welding table, which led me to another idea. Why not build a multipurpose table? One that would not only serve as a welding table but could also house the plasma cutter and be mobile on wheels. Yes, it sounded a little insane, but I decided to give it a shot.


I envisioned a table with four hydraulic jacks for leveling and wheels for mobility. This way, I could move it outside or to other work areas as needed. My long-term plan was to automate the jacks with motors—one to control the valve and another for pumping. That’s a project for another day, though.


Metal Sheet 200x120cm
I ordered a custom steel sheet, 5mm thick, to use as the tabletop. It measured 200x120cm, with holes on the left side for welding and a large square cutout on the right side for the plasma cutter. The table itself ended up being 250x120cm, which is a great size for welding projects. The 90x90cm hole for the plasma cutter was more than sufficient.


Once the table was complete, I tested its flatness by adding a fence. It worked perfectly! Next, I mounted the JD Plasma frame and began working on the wiring for the controller


Wireing controller
For the controller, I started with an Arduino Uno, three motor drivers, a diode bridge, and a 12V-to-220V switch. Over time, I added a Bluetooth module for easier connection to my laptop. I updated the Arduino firmware to GRBL 1.1 and integrated the Bluetooth module, creating a very handy remote-controlled system. This part of the JD plans was fantastic, with clear manuals and connection guides.


JD Plasma Mounted
So now i have mounted my JD frame onto my new table !

After mounting the JD frame onto the table, I thought I had achieved something great. But as I started testing, I noticed some serious issues. The Y-axis was driven by a single arm, which caused vibrations and movement instability. The plastic I used (PLA+ Industrial) wasn’t the best choice either—it cracked under stress. Additionally, the budget-friendly design with ball bearings on the rail wasn’t ideal for precision.
At this point, I decided to abandon most of the JD setup, except for the controller and belt drive.!
New plan!
So i wanted to go with 2 rails system on each side of X axis + 2 rails for better stability on Y axis.
Decision is to make U shaped frame that would be attached to table sides - so 120 cm at least!
On top of that - it could give me some more rigidity, so i can add small 750w makita router to it !
On top of that top - i bought LT-80W-AA-PRO LaserTree Laser module - 24V
Whole system should be interchangeable - laser / plasma / router
Need to build new better Z axis, so i can mount all of those attachments
Mark set go!
and frankenstein was ALIVE!!!
Plan was set and executed!
Once the plan was set, I got to work. I welded a U-shaped frame using 6x6cm steel profiles and added 22mm rails for the X-axis. For the Y-axis, I built a bridge using 6x2cm profiles, attached rails, and bolted them to the X-axis carrier. For the Z-axis, I used an aluminum profile with T-shaped nuts to secure the ball screw and 16mm rails. I opted for belts on the X and Y axes for speed, while the Z-axis used a ball screw for precision. The motors were mounted on the axes themselves, eliminating the need for long belts.


I installed the electronics on a panel underneath the table, added a 380V connection, and separated it into three 220V phases. I also wired an additional 24V power supply for the laser and attached a VFD controller for the router, connecting it to the Arduino.

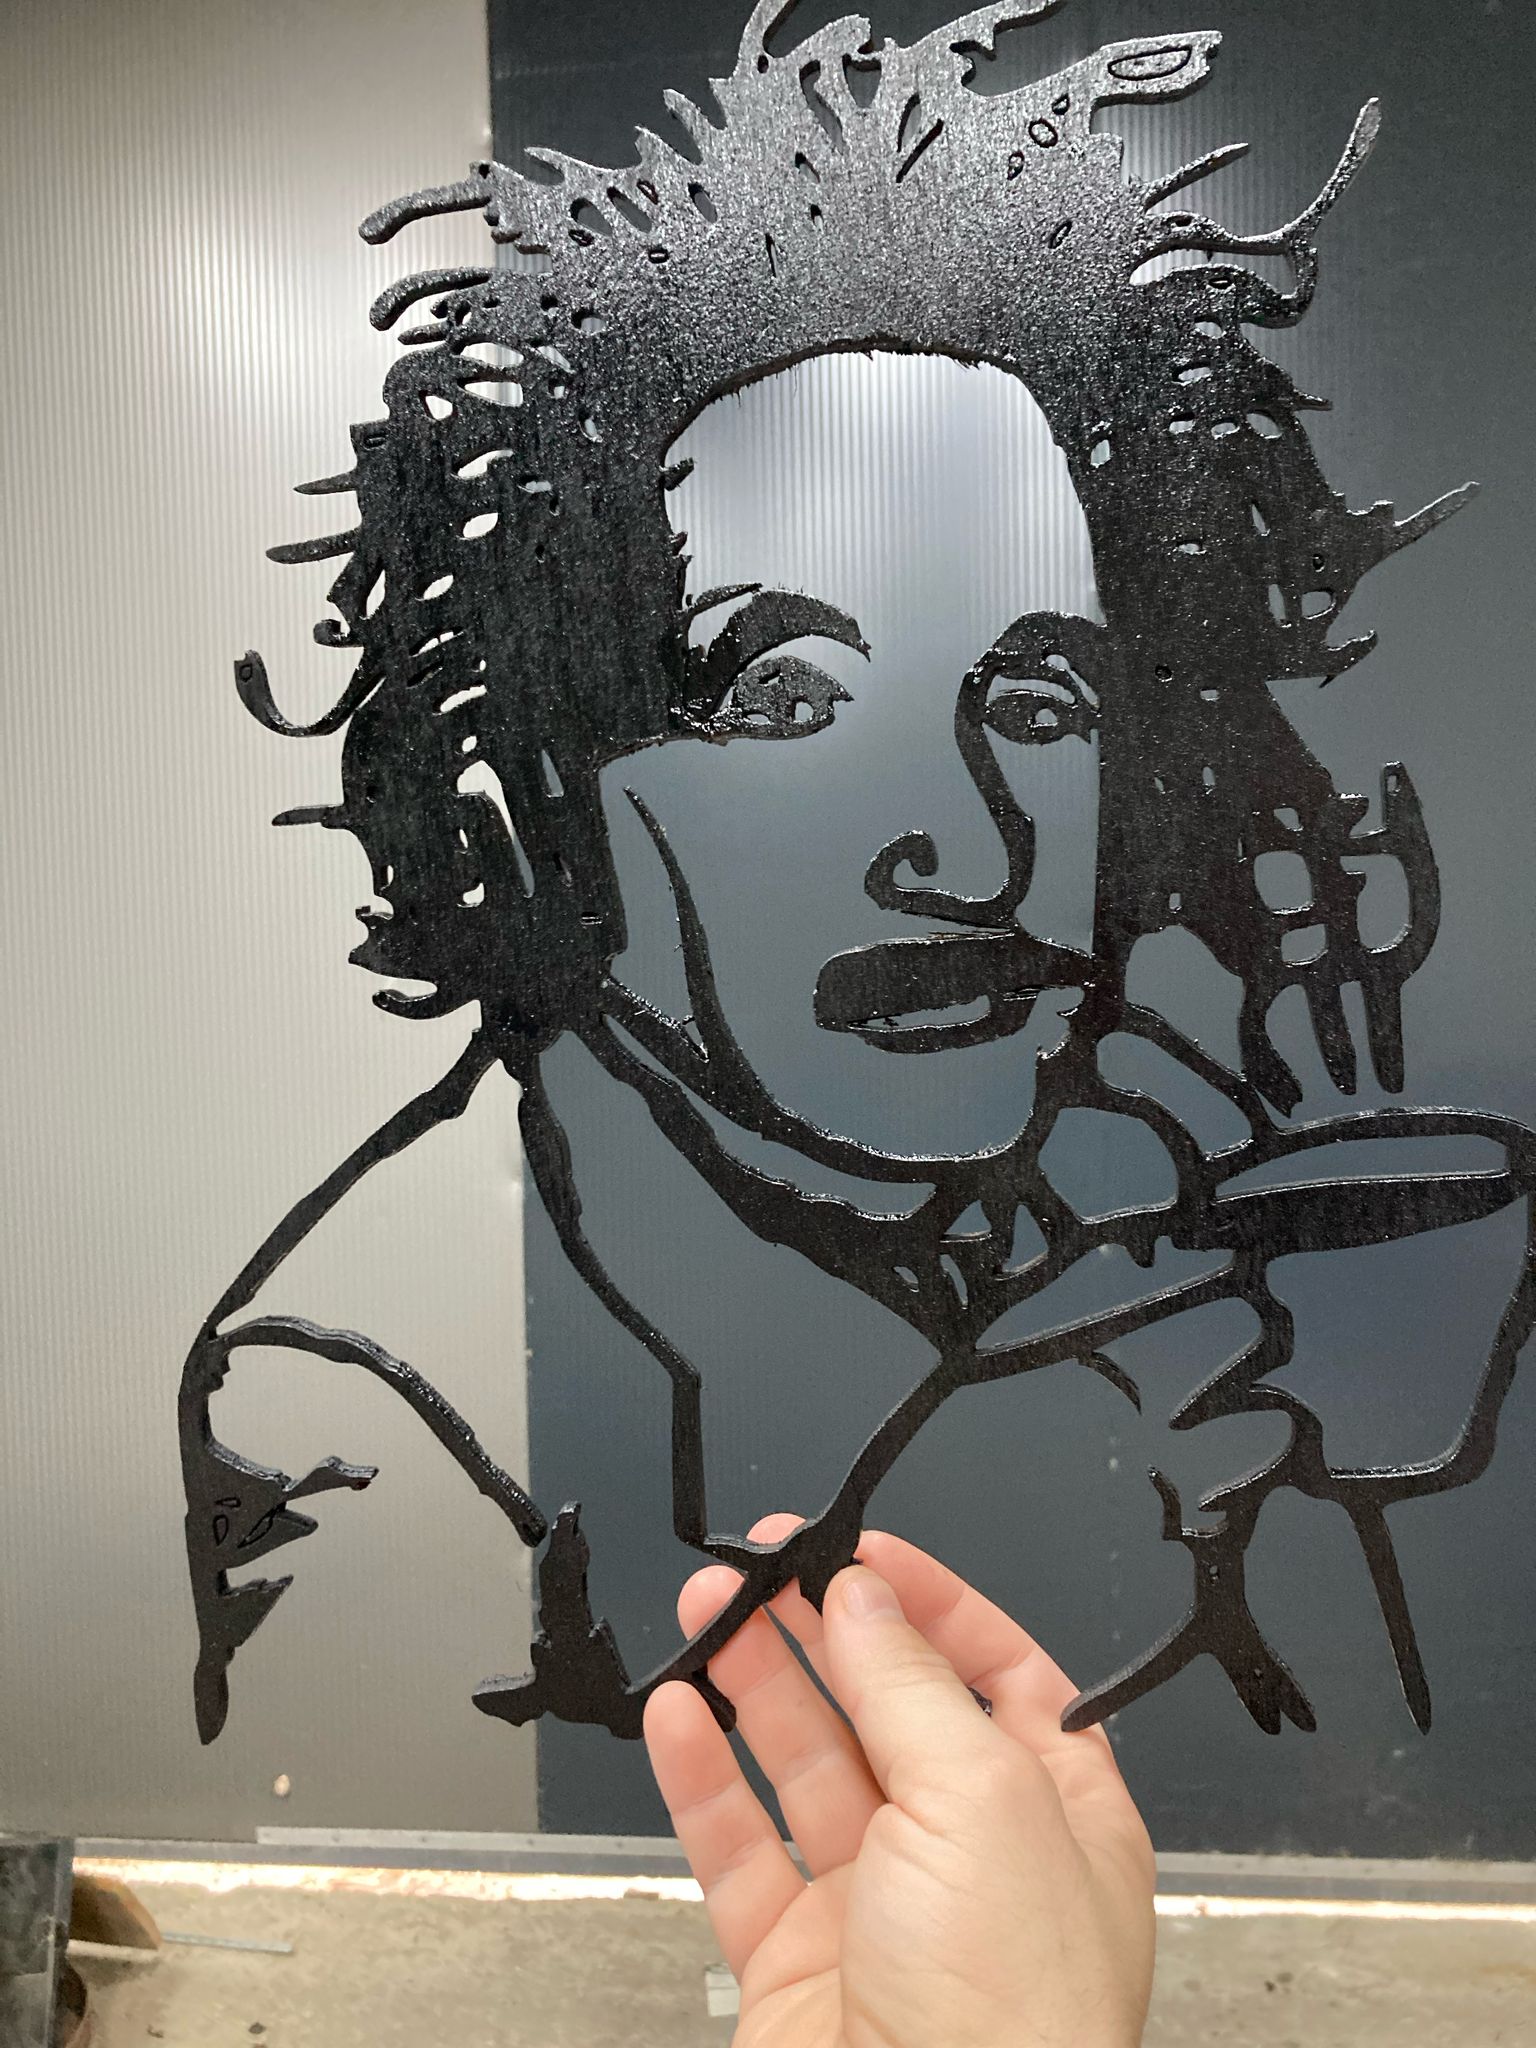
For a quick test, I reused a plastic plate from my old 3D-printed CNC for milling, attached the laser module, and ran my first trial.

The goal was to cut a circle, and it worked perfectly! My Frankenstein machine came to life.

However, I quickly realized that plastic was no longer a viable material.
I switched to aluminum for greater durability and reliability.


Through testing, I found that the system performed well at speeds up to 1300mm/min on wheels and 1800mm/min on jack support. For engraving, the sweet spot was around 750mm/min.
The attachments were easy to swap out with just four bolts.


The final setup included a milling machine with an MDF layer on top for easy fitting and securing of materials.


I put the system through a real stress test: cutting a large 4mm MDF panel at 220mm/min for over 20 hours. The machine passed with flying colors and has since completed several more projects without any issues.
This journey started with a simple plasma cutter idea but evolved into a versatile, high-performing machine. Every step, from mistakes to improvements, brought me closer to creating something truly functional and reliable.


